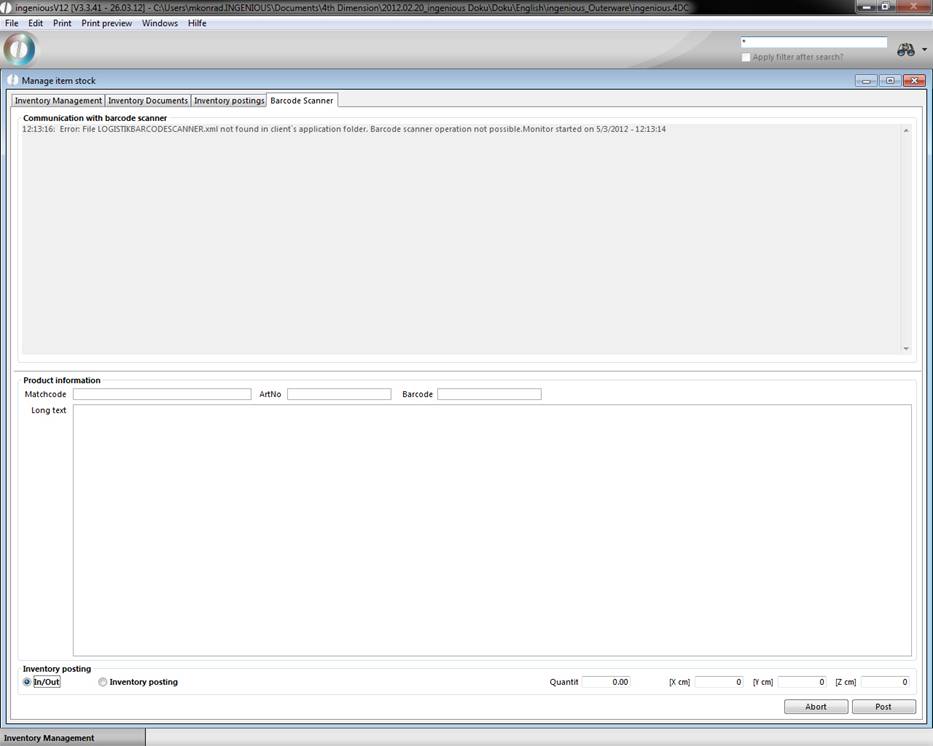
Here receipts of goods and issuing of goods, as well as inventory postings can be executed with the help of a barcode scanner. Here, incoming and outgoing, as well as inventory postings can be activated.

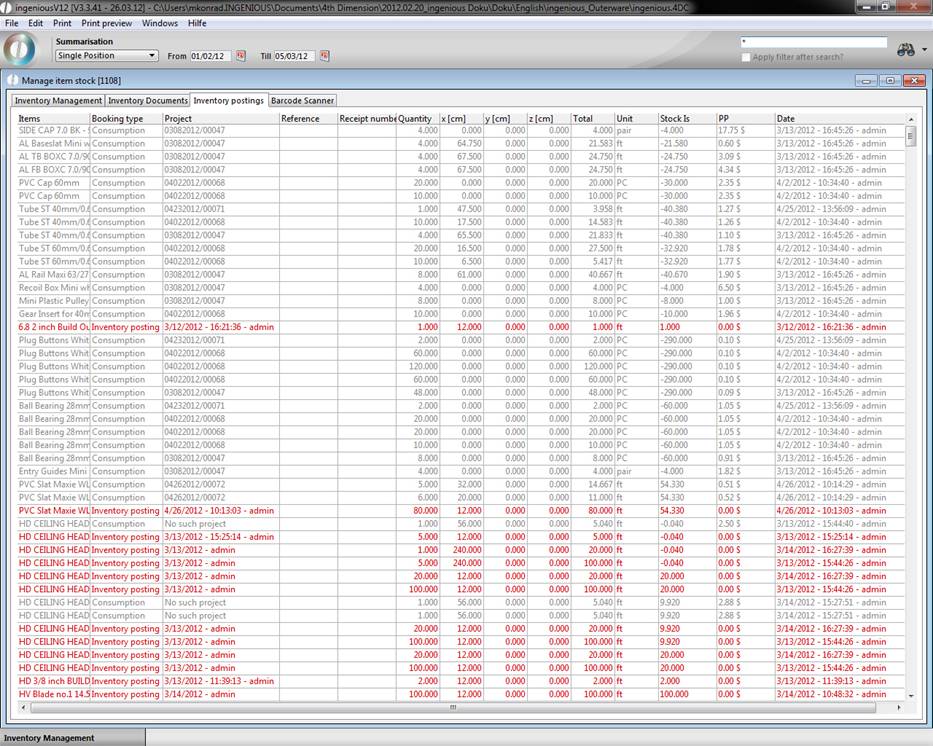
Inventory management consists of three register cards. With the register card “Inventory management”, all inventory postings can be carried out centrally. You have the possibility to find the desired articles with the help of the search functions and to carry out the various postings. Only articles will be listed that activated the option “Automatic inventory management” in the column “Parameter” in the detail view. The located articles are displayed in red when the stock is under the established minimum. When you click on an article, the corresponding information will be displayed in the lower part of the register card.

In the “Inventory posting” area, you can select acquisitions, outflow and inventory postings, you can enter a reference and you can determine the amount and the posting date. In the “PP Unit” field, you can enter unit prices of the article. In the “PP Total” field, the total price will be calculated after the entry. Important: you must be careful that the selected settings are made with the enter key and not with the “Save” button. With this button, all postings will be automatically saved in the database. With the enter key, you will have a preliminary view of the posting status which can be changed by using the “Back” button. Modified articles and/or edited articles appear in bold font in the list.
Via the register „Inventory posting“ you could search systematic for stock posted articles and let them be displayed.
In the “Barcode scanner” register card, a dialog with the bar code scanner will be displayed. You also can select a desired article with ![]() from the catalog. In the lower part of the register card you can manage the scanned articles in stock.
from the catalog. In the lower part of the register card you can manage the scanned articles in stock.
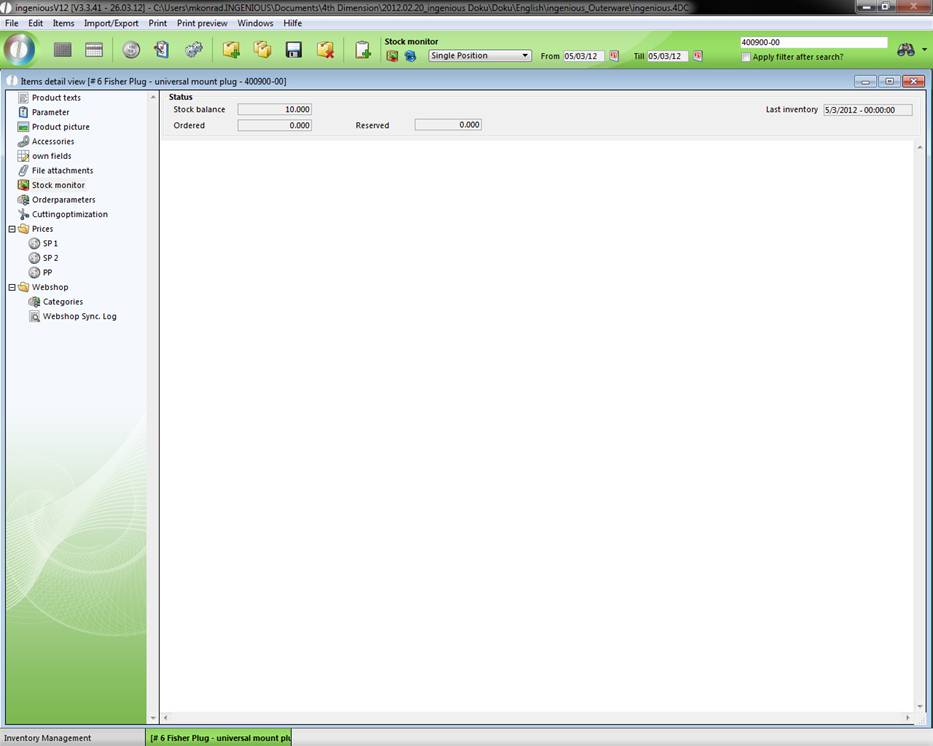
In order to determine if a posting has been made, click in the “Article” module in the detail view of the article on the column “Inventory monitor”, and the postings made will be displayed.
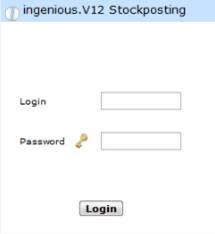
From version 2.4.6 a new barcode scanner module is included in ingenious.V12. With the module you can perform inventory postings with a web browser running on a barcode scanner.
In the browser you have to go to the following web site: http://[Webserver_IP]:[Port]/BCS/
Then the login screen for the barcode scanner module will be displayed.
The login can be skipped, when you add the user and the password to the address: http://[Webserver_IP]:[Port]/BCS/user=[user]&pass=[password]
[Webserver_IP], [Port] have to be replaced according to the webserver preferences.
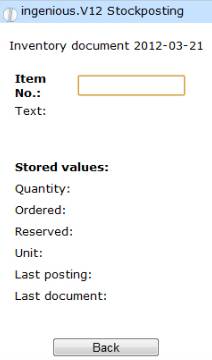
After the login an overview of postings will be displayed. That can be direct postings or not completed posting documents. When posting in documents, the postings will only be added to the document and can be posted in a collection after checking/correction.
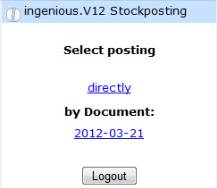
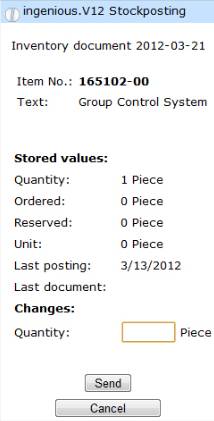
In the following form item numbers can be scanned as barcodes or can be entered directly. The item will be searched in the database and according to the result an error message or the item information will be displayed: item number, item description, quantity, minimum stock level, delivery time and if available the total of the posting in the document. Inputs for the stock posting are posting quantity, minimum stock level and delivery time. The posting quantity can be added to the current quantity, it also can be a correction of the last value, or you can override the current value (new posting). If there isn’t any posting information in the document, the three selection buttons will not be displayed.
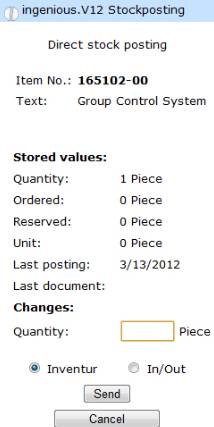
With direct postings a correction of the last posting is not possible; in return you can post goods in and out.
You can reduce the information on the web site to provide a better presentation on the scanner. In the fullscreen view in the browser all fields are visible without scrolling.
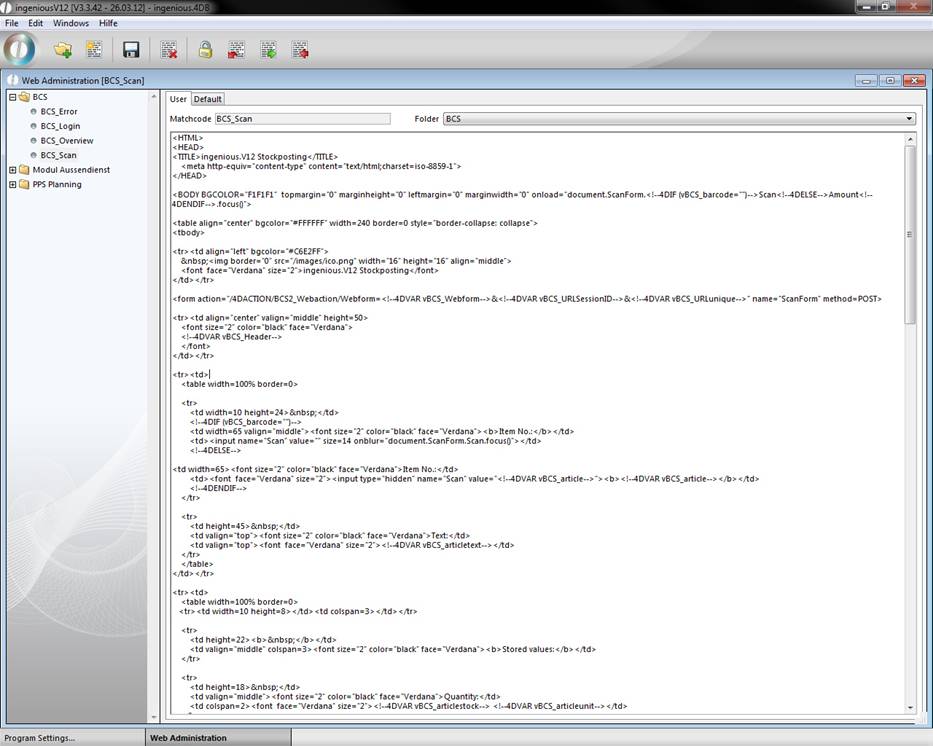
The web templates are deposit in the program settings in the category “Web server” and can be customized.
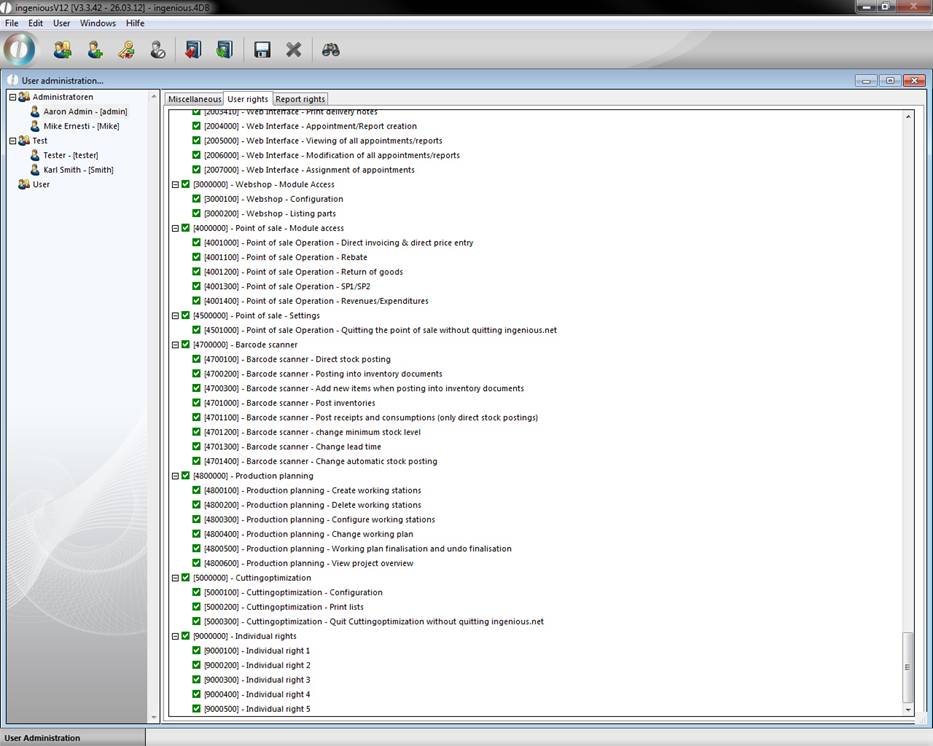
To use a barcode scanner a module license is necessary and user rights have to be enabled.
|
User right |
Function |
|
4700000 |
Allows the login of the user with the barcode scanner in the login dialog. |
|
4700100 - 4700200 |
Regulates the access to the postings. |
|
4700300 |
If enabled scanned items that are not available in the document will be created, otherwise only available items can be scanned. |
|
4701000 - 4701300 |
Regulates which actions the user can perform with scanned items (inventory postings, stock moving, modify minimum stock level, change delivery time) |
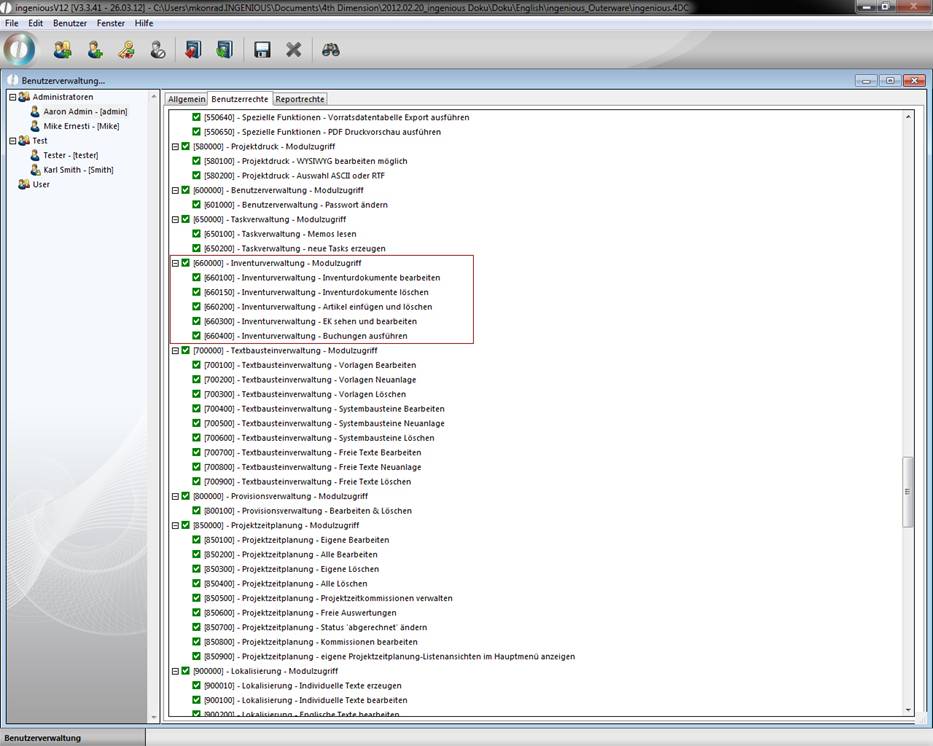
Inventory Management
To be able to use the “Inventory Management” the corresponding user rights have to be enabled.
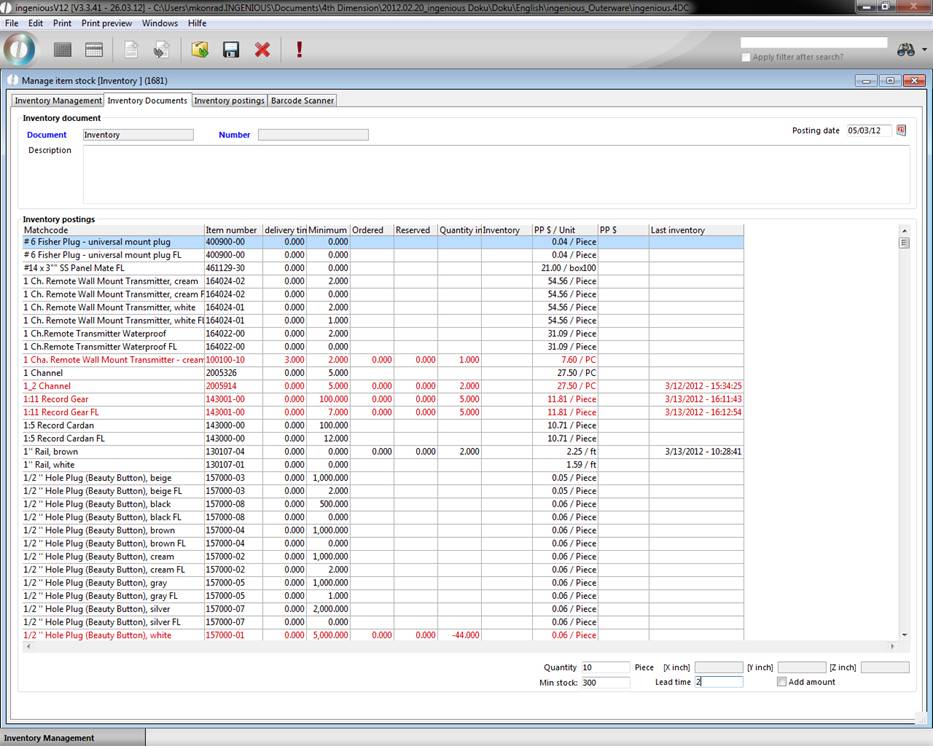
Now the inventory document appears as another tab of the menu entry inventory management.
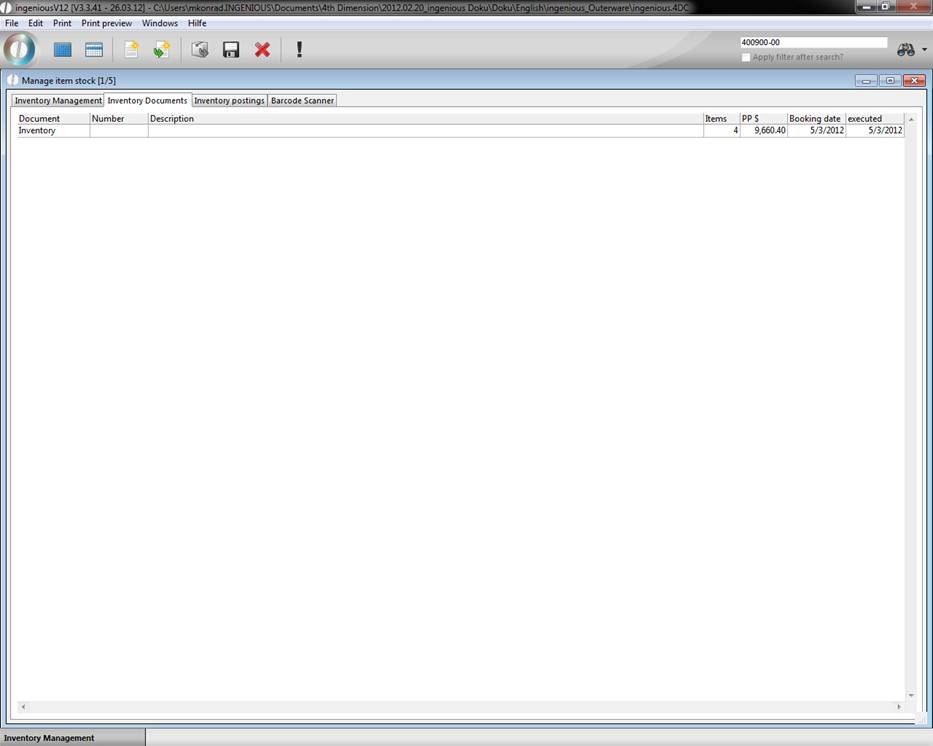
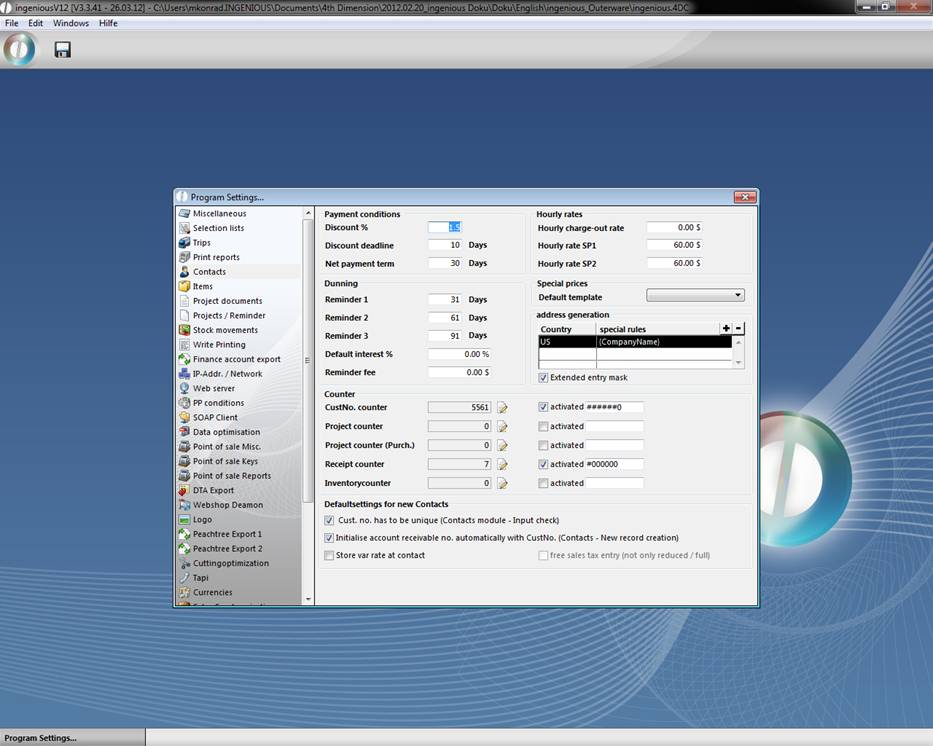
To clearly identify the inventory documents a additional counter was added that you can find in the category “Contacts” in the program settings, that you can activate by enabling the field “Inventory counter”.
With the button ![]() you can add a new inventory document and define manually, which items you want to add in the inventory. With the button
you can add a new inventory document and define manually, which items you want to add in the inventory. With the button ![]() ingenious.V12 creates a document automatically. In the displayed window you can define, which items should be regarded and what should happen to the existing inventory information.
ingenious.V12 creates a document automatically. In the displayed window you can define, which items should be regarded and what should happen to the existing inventory information.
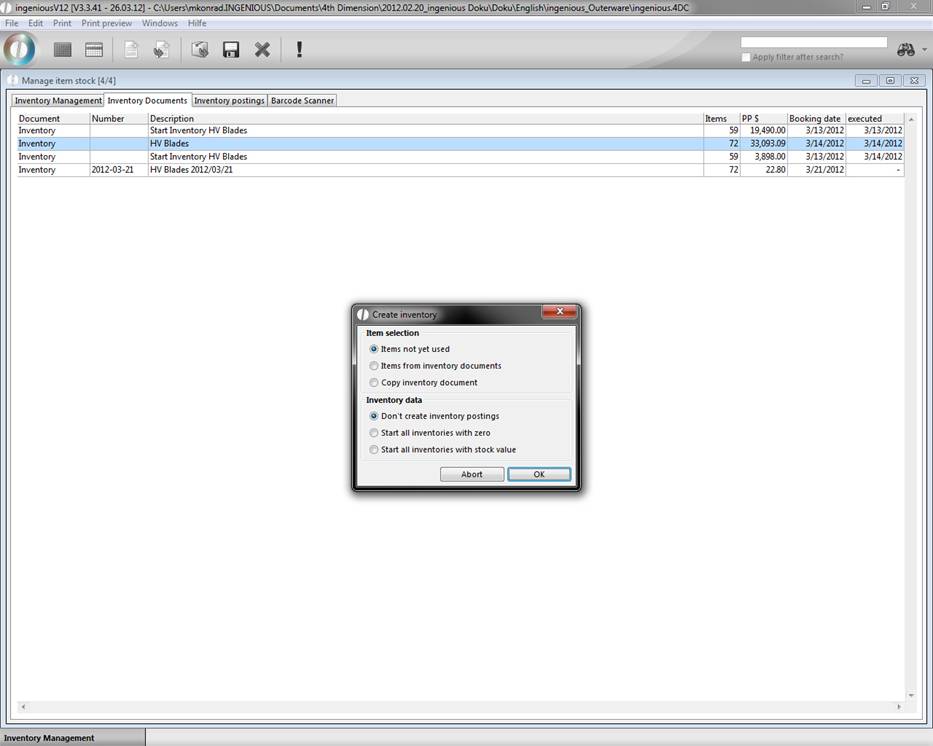
If you set the desired configuration a listing of all stock posted items will be displayed.
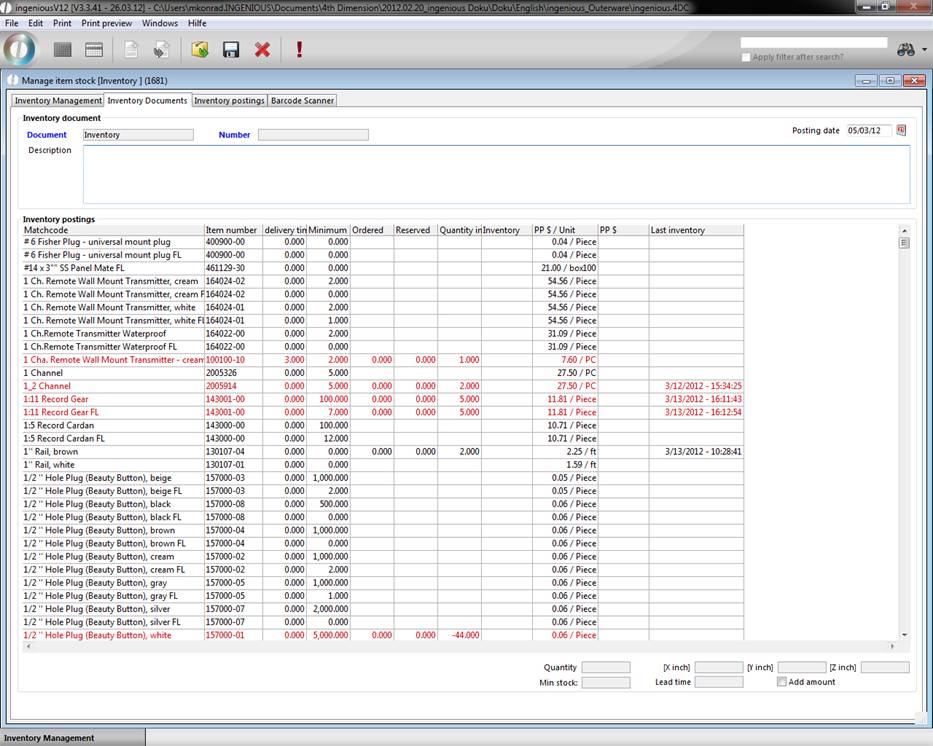
The red colored ones have a quantity smaller then the defined minimum stock level. With the help of the search function you can determine inventory items in different postings and directly in one posting. By clicking the button ![]() you delete a listed item from the document and with the help of the button
you delete a listed item from the document and with the help of the button ![]() you can add any item. By clicking the corresponding item you can enter the available quantity, minimum stock level and the measurements in the bottom area. When you press the return key, the entered values will be accepted and immediately the next item will be displayed.
you can add any item. By clicking the corresponding item you can enter the available quantity, minimum stock level and the measurements in the bottom area. When you press the return key, the entered values will be accepted and immediately the next item will be displayed.
When you click the button ![]() , the inventory posting will be performed.
, the inventory posting will be performed.
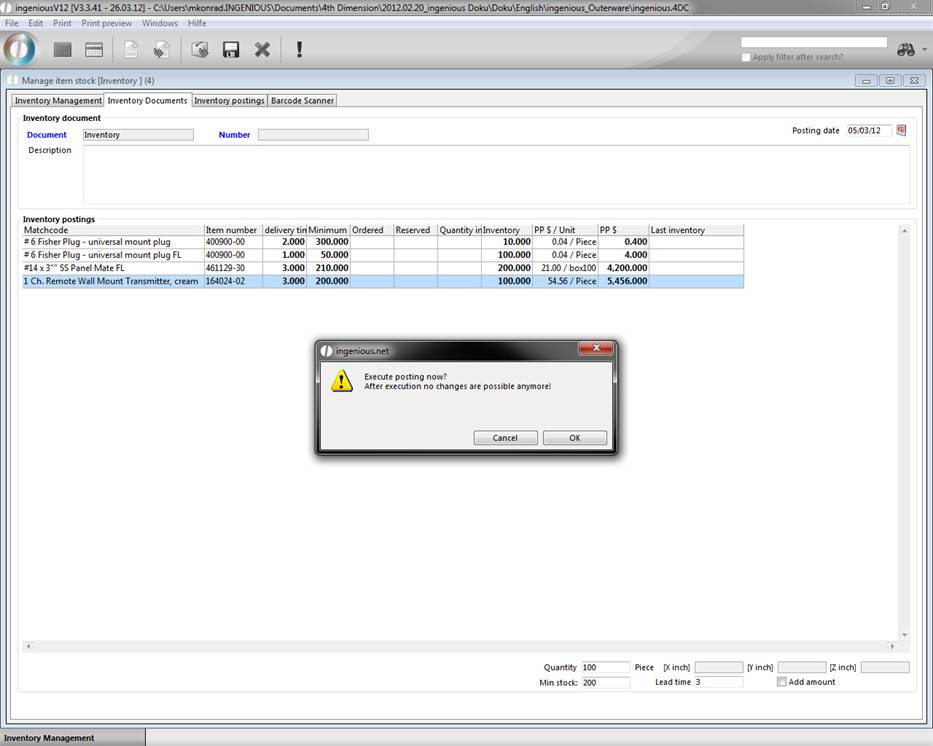
The inventory posting will be automatically registered in the stock monitor of the corresponding item.